
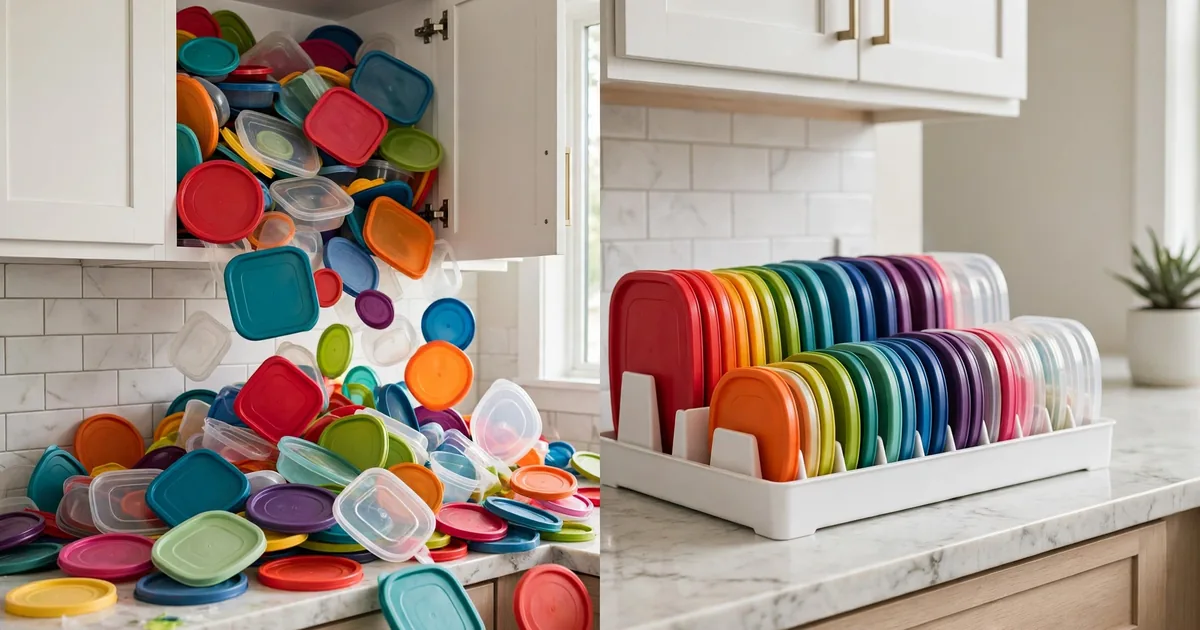

The fastest win in food container lid storage: file your lids upright like records in a crate and the avalanche stops for good. That one change, storing lids vertically instead of stacked flat, fixes about 90 percent of lid chaos because every lid stays visible and you can pull one out without moving the rest. The sections below give you 12 ways to do it, from a $1 Dollar Tree hack to a $25 adjustable organizer, plus the purge and maintenance routine that keeps the system working.
TL;DR: the lid system that actually works
- Separate lids from containers. Nest the containers, file the lids upright.
- Vertical filing beats flat stacking in every cabinet, drawer, and shelf tested by real kitchens.
- A magazine holder, a dish rack, or two tension rods does the job for under $10.
- The YouCopia StoraLid ($24.99 at Target) is the best buy-it-once organizer for mixed collections.
- Purge first: match every lid, retire warped and orphan pieces, then buy nothing until you know your real count.
| Method | Typical cost | Best for | Space needed |
|---|---|---|---|
| Vertical filing in an adjustable organizer | $15 to $25 | Mixed lid collections | One drawer or shelf zone |
| Magazine holder hack | $5 to $12 | Cabinets with tall shelves | 4 to 5 inches of shelf width per holder |
| Tension rods in a drawer | $8 to $14 for two | Deep drawers | Drawer at least 4 inches deep |
| Dish rack slots | $8 to $15 | Renters, no-install fixes | One cabinet shelf |
| Cabinet-door rack | $10 to $20 | Small kitchens short on shelves | Inside of one cabinet door |
| Dollar Tree napkin holders | $1 to $3 | Tight budgets | 6 to 8 inches of shelf |
| Undershelf basket | $8 to $15 | Dead air under a shelf | 4 to 5 inches of clearance |
| Pull-out bin | $15 to $30 | Deep lower cabinets | Full cabinet depth |
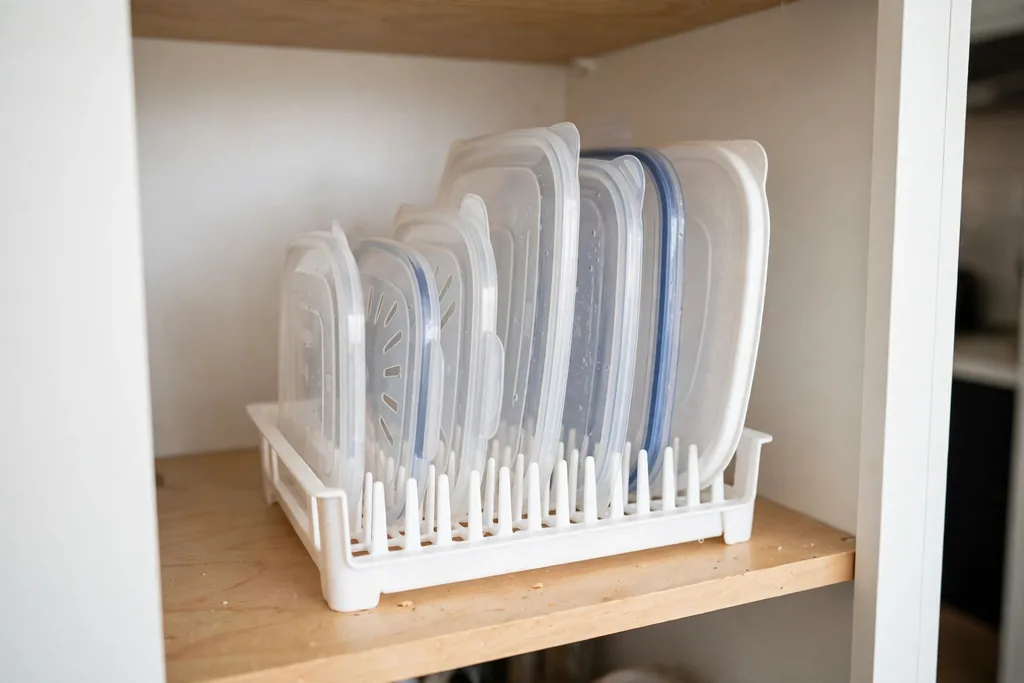
How does food container lid storage turn into an avalanche?
Flat lids stacked in a pile are a physics problem, not a personality problem. Each lid is a smooth, slightly domed disc with almost no friction, so the whole stack behaves like a deck of cards on a tilted table. Open the cabinet, bump one edge, and gravity does the rest. The lids at the bottom are invisible, so you dig, and digging is what starts the slide.
This isn't a rare frustration. A Rubbermaid survey found 91 percent of Americans feel overwhelmed by clutter at least sometimes (via PR Newswire), and kitchen cabinets are one of the worst offenders because the mess is hidden until the exact moment you're in a hurry. A Pixie survey put the cost of lost items at 60 hours a year and $2.7 billion in replacements across US households. Lids are small, but the minutes you spend hunting the right one add up across hundreds of leftover-packing sessions.
My take: stop blaming yourself and blame the stacking. Nobody is disorganized enough to defeat gravity with a pile of smooth plastic discs. The fix is structural, which is good news, because structural fixes work for everyone in the house, including the people who will never read an organizing article.
What's vertical filing, and why does it beat flat stacking?
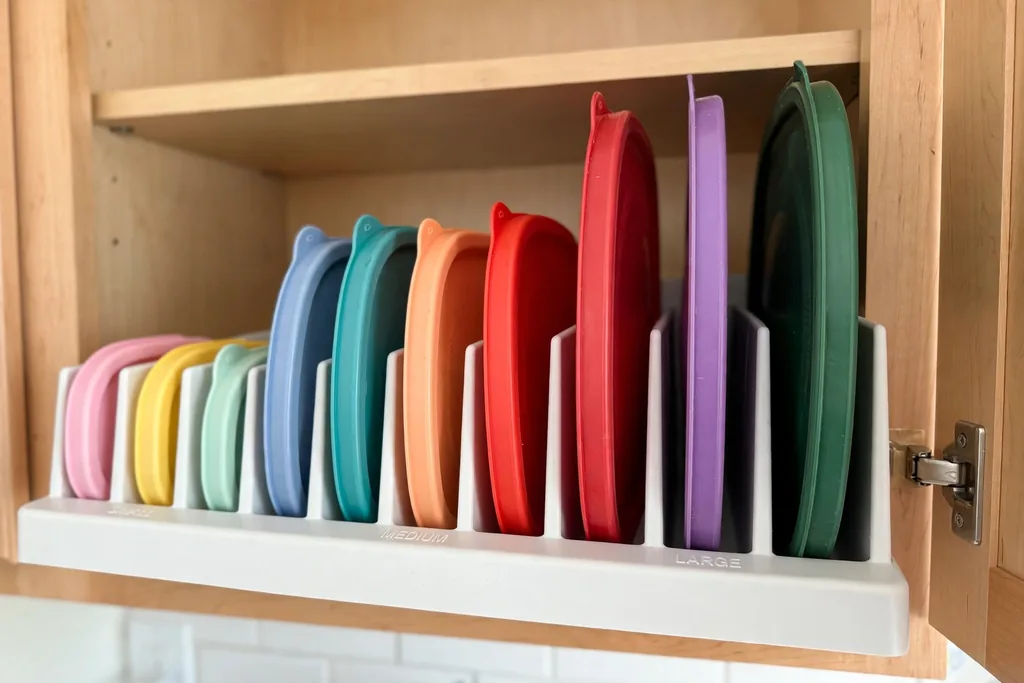
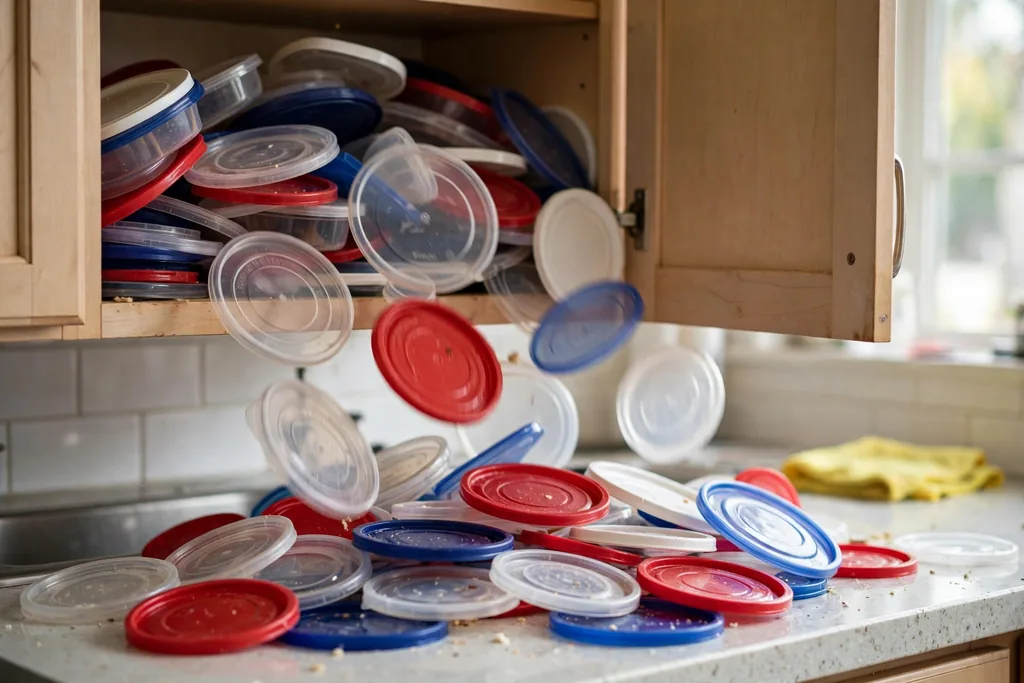
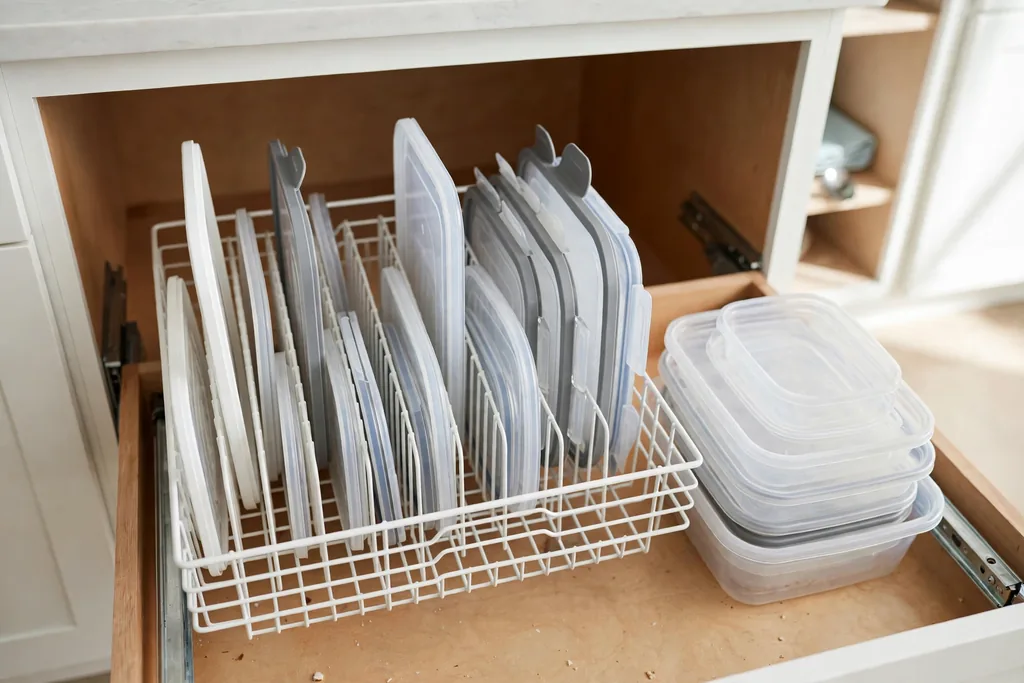
Vertical filing, the core move in food container lid storage, means storing lids upright on their edges, like vinyl records in a crate or folders in a filing cabinet, instead of stacked flat in a pile. You can see every lid at a glance, pull out one without touching the others, and slide it back into its slot in one motion. It beats flat stacking because nothing hides at the bottom of a pile and nothing slides when you open the door.
The reason it works so well is visibility. Research published in the Journal of Neuroscience (Princeton, McMains and Kastner) showed that visual clutter competes for neural representation and measurably hurts focus. A pile of lids is the cabinet version of that experiment: your brain has to sort the mess before your hand can act. A filed row removes the sorting step entirely.
Here's my honest opinion: in all of food container lid storage, vertical filing is the only lid method worth building a system around. Every other approach in this guide is just a different way to hold lids upright. If a product or hack doesn't keep lids vertical, visible, and individually removable, skip it, no matter how clever it looks in a photo.
How do you file lids with the magazine-holder hack?
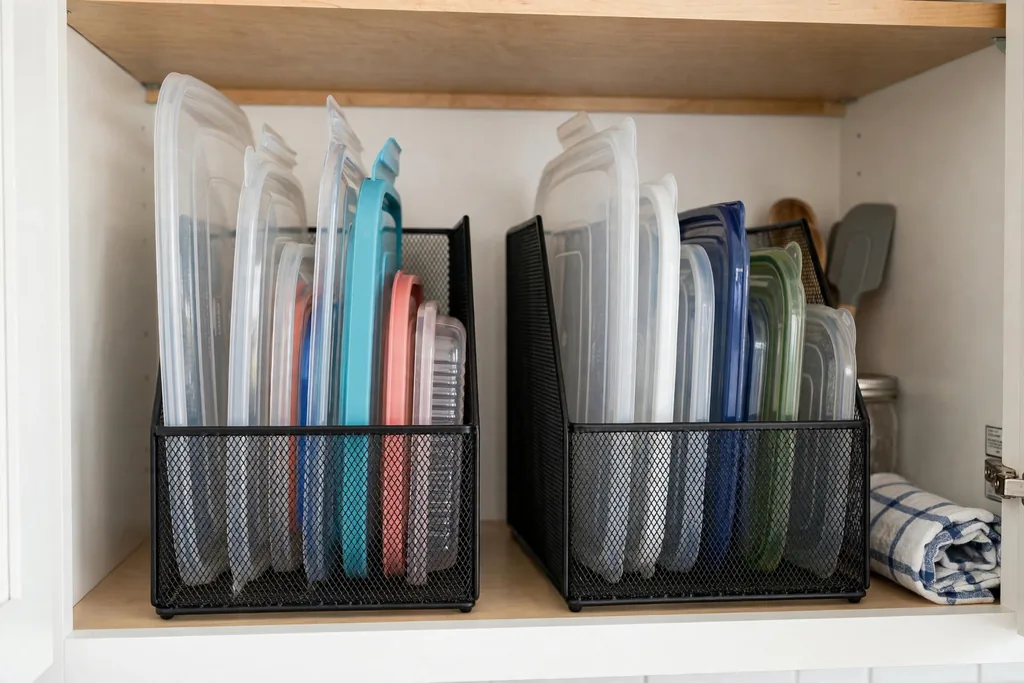
Stand a metal mesh magazine file holder on your cabinet shelf and slide lids into it vertically, like folders. It's the cheapest real upgrade in food container lid storage. A standard holder is about 4 inches wide and 9 to 10 inches tall, which fits most cabinet shelves and holds 8 to 12 lids depending on thickness. Use one holder for large lids and a second for small ones.
This is the hack the queue angle called for, and it earns the hype for three reasons. First, it's cheap: wire mesh holders run $5 to $12 at office supply stores and Target. Second, it's sturdy: the tall sides keep lids from flopping sideways, which is the failure mode of shallow bins. Third, it needs zero installation, so renters can use it today and take it when they move. A desktop file organizer does the same job if you already own one.
Who is this not for? If your cabinet shelves are less than 10 inches apart, tall holders won't fit, so measure shelf height before you buy. Very thick glass lids can also wedge in narrow mesh holders, so test one lid first. For everyone else, this is the fastest win in the guide: buy the holder, file the lids, done in five minutes.
Which lid organizer is actually worth buying?
In the crowded world of food container lid storage products, the YouCopia StoraLid Container Lid Organizer is the one I would buy with my own money. It sells for $24.99 at Target (check the current price), expands from 13.2 to 21.3 inches to fit your drawer or cabinet, and includes 8 adjustable dividers that create custom slots for small, medium, and large lids, round or square. The dividers are the whole point: fixed-slot organizers fail the moment your collection changes.
The category is bigger than one product. The US home organizers and storage market was valued at $12.05 billion in 2025 and is projected to reach $15.21 billion by 2030 (Mordor Intelligence), which means you will see dozens of lid organizers with big promises. Judge any organizer on three things: adjustable dividers, a footprint that matches your actual space, and sides tall enough to keep lids upright when the organizer is half empty.
My judgment: if your lids are mostly one size, save your money and use the magazine-holder hack. If you'd rather skip filing altogether, snap-together sets like Rubbermaid EasyFindLids and Joseph Joseph Nest Lock keep each lid attached to its container so there's nothing to file. For a mixed loose collection, the adjustable organizer earns its $25 because it ends the daily dig for good.
How do you organize lids in a deep drawer?
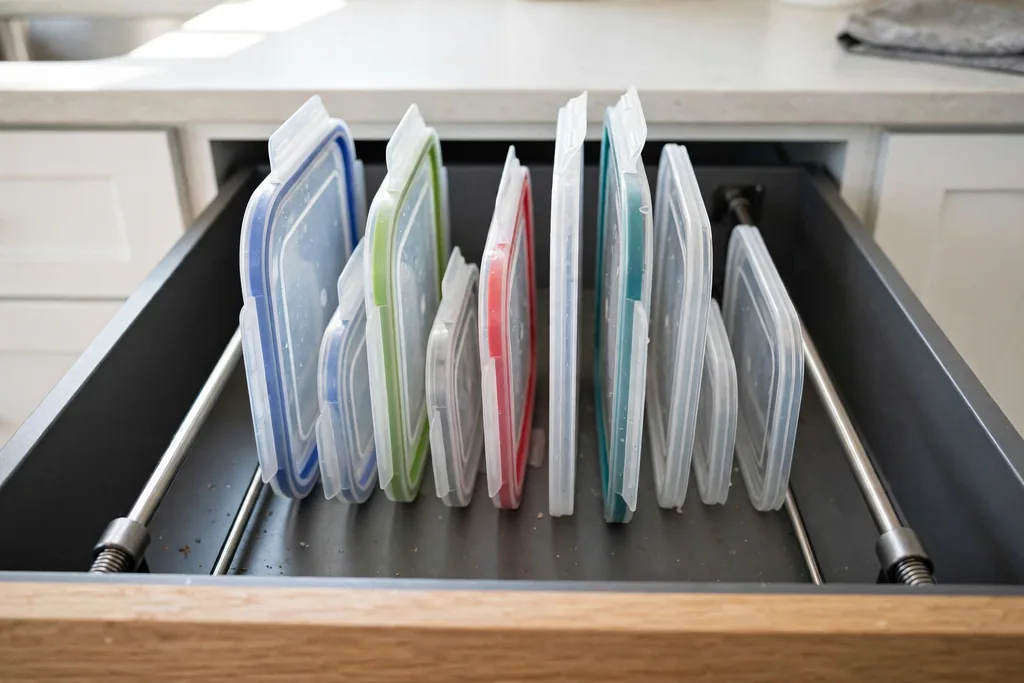
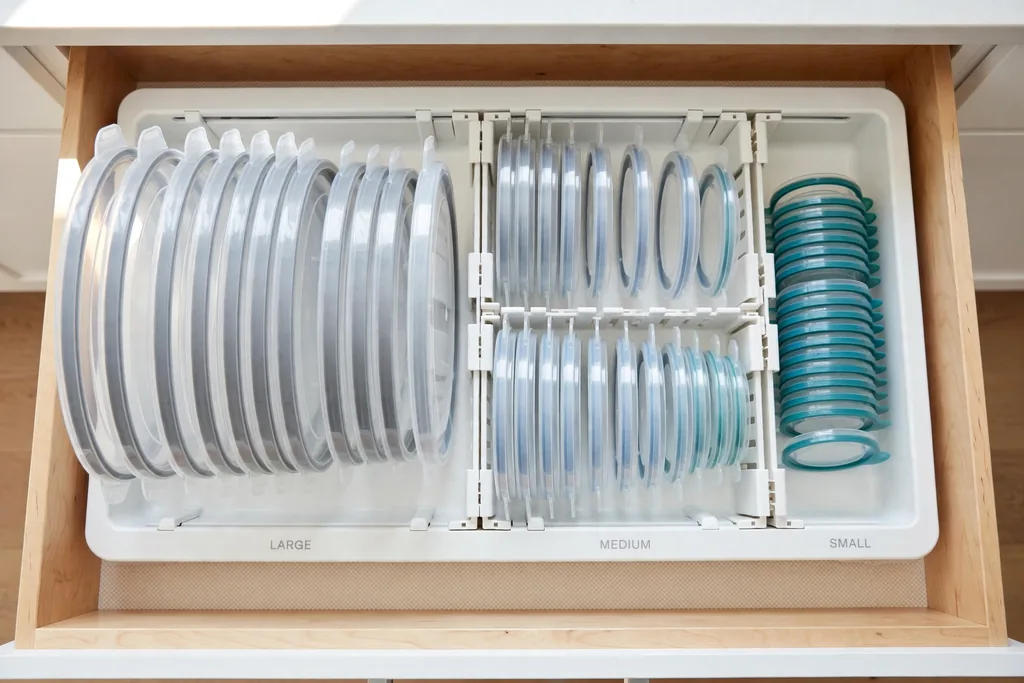
A deep drawer is the best real estate in food container lid storage, because you see everything from above. Split the drawer into two zones with drawer dividers: nested containers on one side, lids filed vertically on the other. Bamboo spring-loaded dividers or simple plastic ones both work; they just stop stacks from sliding when the drawer opens and closes.
The tension-rod trick is the cheapest way to build the lid zone. Install two small tension rods front to back, a few inches apart, and slide lids upright between them. Two rods cost $8 to $14, need no tools, and leave no marks, which renters love. Measure the drawer interior first, because rails and hardware eat into the usable width, and rods need a snug fit to stay put.
Here's the trade-off nobody mentions: a drawer system only works if the drawer is actually deep enough. Lids filed vertically need about 4 inches of clearance for small lids and up to 7 for large ones. Who is this not for? Shallow drawers under 4 inches deep. If that's your drawer, don't force it; give lids their own shallow drawer filed at a slight angle instead. Our kitchen drawer organization guide covers divider layouts that pair well with this setup.
What works on a regular cabinet shelf?
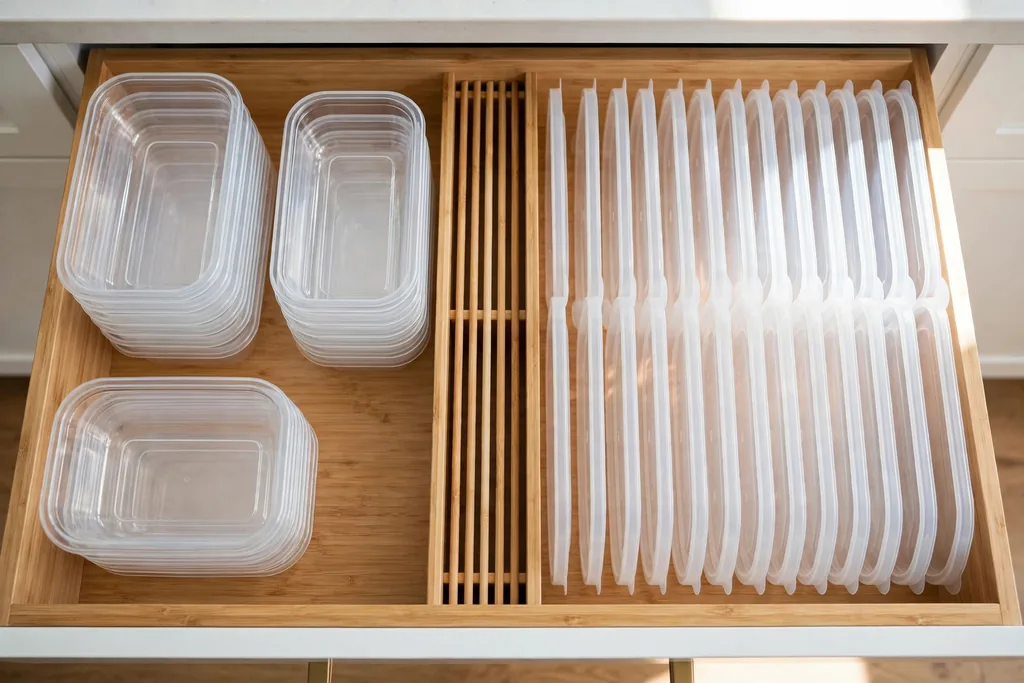
For food container lid storage on a standard cabinet shelf, you have three solid options, all filing lids vertically. First, a low open bin with straight sides: stand lids upright inside like files, since tapered bins waste the bottom corners. Second, a small dish drying rack: the plate slots are already the perfect width for lids, and a basic rack costs $8 to $15. Third, an undershelf basket clipped onto the shelf above, creating a shallow suspended zone for lightweight lids while containers sit below.
The dish rack is my pick: cheap, stable, with slots spaced for exactly this kind of flat item. A wire cooling rack laid over a shallow basket works on the same principle, with lids slid upright into the grid, a trick Chowhound readers swear by. Set it toward the front of the shelf so you're not reaching past the cereal boxes. The undershelf basket is the clever one for short shelves: it uses dead air, but check clearance first, because a basket that hangs too low will block the containers underneath.
One honest admission: shelf methods hold fewer lids than a deep drawer. If your collection is large, split it. Daily-use lids live on the easy shelf, holiday and batch-cooking lids go higher or farther back. Frequency zoning just means the lunch lids you grab five times a week should never live behind the Thanksgiving lids. Our kitchen cabinet organization guide has more shelf layouts worth stealing.
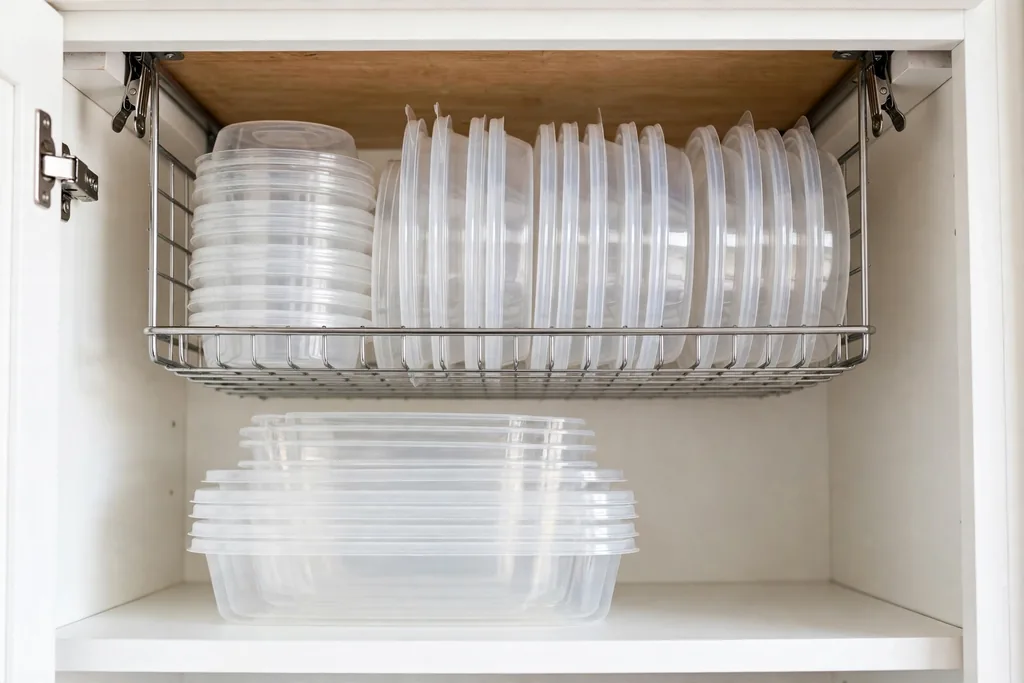
Can you store lids on the inside of a cabinet door?
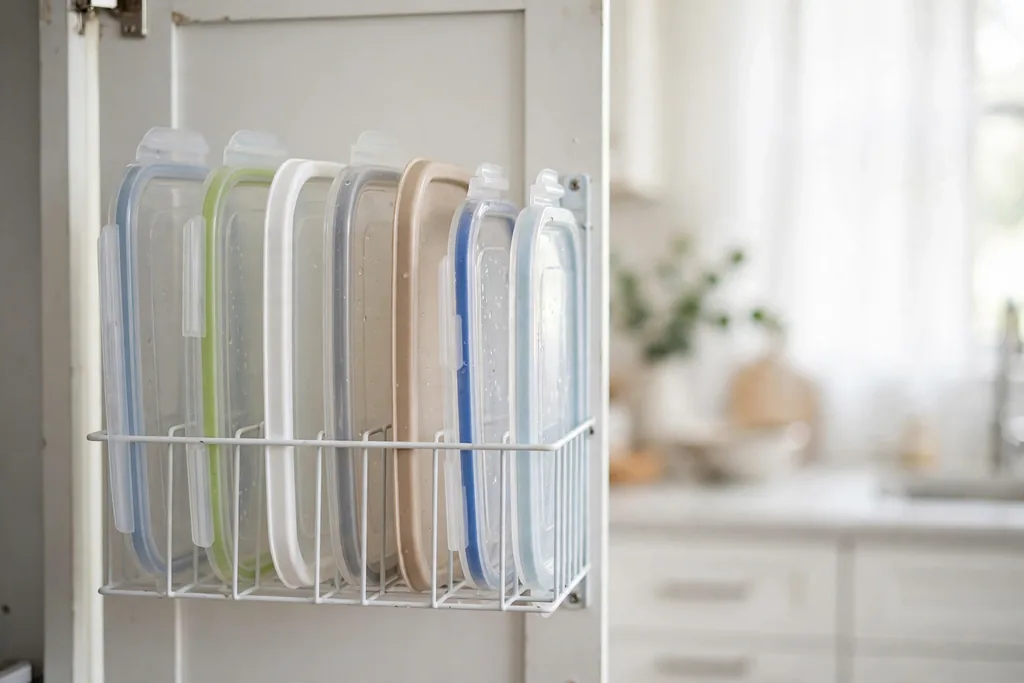
Yes, and it's one of the most underrated plays in food container lid storage, if the lids are light and the rack is slim. A narrow wire or plastic file holder mounted on the inside of a cabinet door holds lids upright without using a single inch of shelf space. Close the door slowly with the rack empty first and confirm it clears the shelves, hinges, and cabinet framing. Then load it with your lightest lids and close it again to check.
Mounting matters more than the rack. Adhesive strips like 3M Command hold well on flat cabinet doors, but every strip has a weight rating, so add up your lids honestly. A dozen thin plastic lids weigh almost nothing; six glass lids are a different story. Screws hold more, but most renters can't drill cabinet doors, so adhesive is the realistic path.
Who is this not for? Anyone with heavy glass lids should skip door storage entirely. Glass lids are thick, heavy, and unforgiving, and a door that gets slammed daily is the worst place for them. Use the door for a small overflow set of light lids and keep the daily drivers on a shelf. Pot lid organizers cross over here too; our pots and pans storage ideas guide covers the sturdier racks built for that weight.
What's the cheapest way to tame lid chaos?
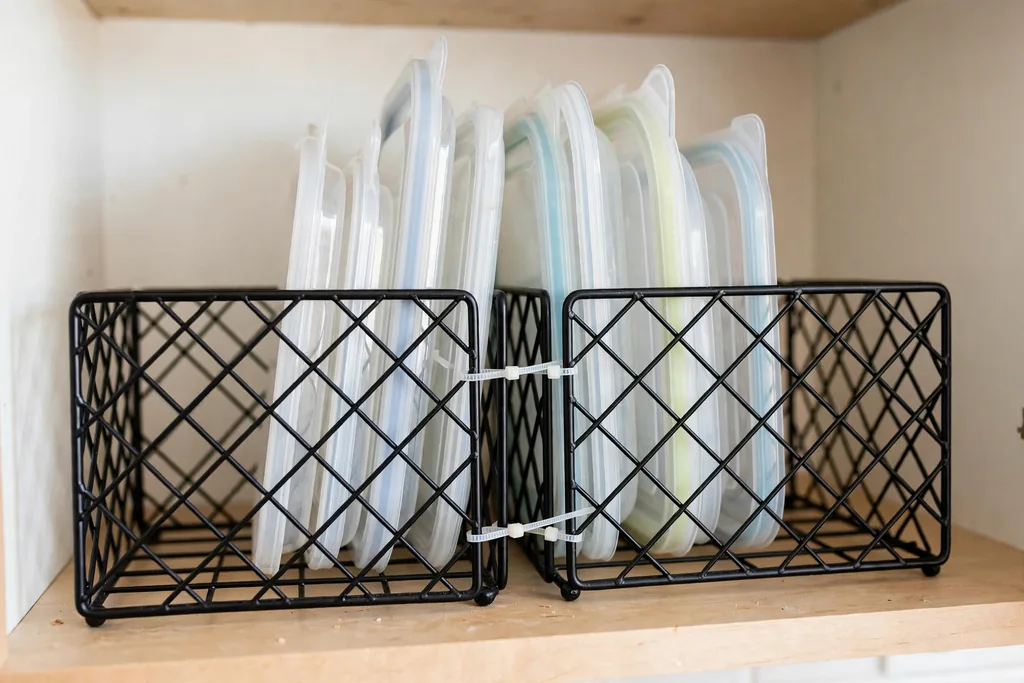
Two wire napkin holders from Dollar Tree, zip-tied together, for about $1 to $3 total: the cheapest real move in food container lid storage. Stand them on a shelf, file lids between the wire frames, and you have a lid organizer that works as well as products costing ten times more. Mom.com covered this exact hack in October 2026 and noted you can line up several holders to make one long lid station for a big collection.
The runner-up costs nothing: cut down a cereal box on a diagonal and file lids inside it. It looks humble, but the tall back panel keeps lids upright and the whole thing is free. A small dish rack from a discount store, usually under $10, is the sturdiest budget pick if you want something that looks intentional.
Here's my honest take on budget versus buy-it-once: cheap wins when your collection is small and stable. If you own 10 lids and rarely buy containers, the napkin-holder hack will serve you for years. If your household burns through containers, hosts holidays, and meal-preps weekly, the collection keeps changing shape, and that's when adjustable dividers earn their price. Match the solution to the chaos level, not to your aspirations.
| Budget tier | What to get | Cost | Honest verdict |
|---|---|---|---|
| Under $5 | Dollar Tree napkin holders, cereal-box file | $1 to $5 | Perfect for small, stable collections |
| $5 to $15 | Magazine holders, dish rack, tension rods | $5 to $15 | The sweet spot for most kitchens |
| $15 to $30 | Adjustable lid organizer, pull-out bin | $15 to $30 | Worth it for big or changing collections |
How do you store glass and silicone lids differently?
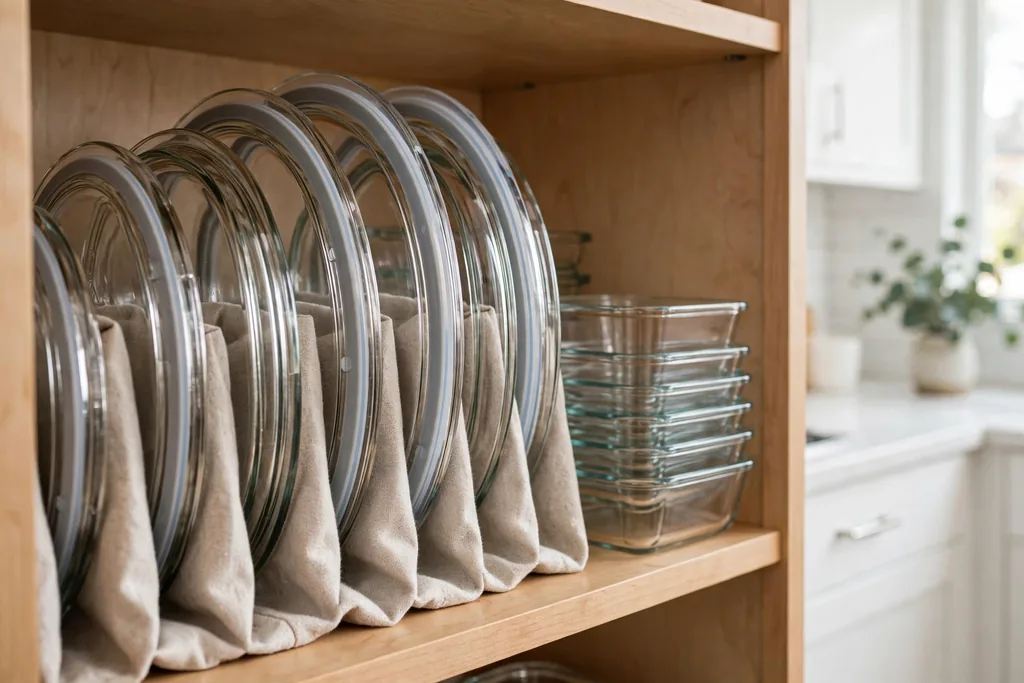
This is the part of food container lid storage most guides skip: glass lids need padding and low placement; silicone lids need dust protection. None of the ranking guides say this clearly, so here it's. Glass container lids are heavy and chip when they knock together, so file them vertically with a soft divider between each one, a folded dish towel or a felt pad works, and keep them on a low shelf where a slip can't turn into a fall. Never mount glass lids on a cabinet door.
Silicone lids have the opposite problem: they are light, floppy, and attract dust and pet hair with static. Store them vertically in a lidded bin or a closed drawer rather than open on a shelf. If your silicone lids came with the stretch-to-fit style tops, roll the large ones instead of folding them; sharp folds weaken the seal edge over time.
My opinion: if you're slowly switching from plastic to glass, plan the lid storage before you buy the containers. Glass collections need wider slots, sturdier organizers, and more shelf space per lid. People buy the pretty glass set, then discover their $8 plastic organizer can't hold the lids, and the avalanche starts again with heavier ammunition.
When should a lid be retired instead of reorganized?
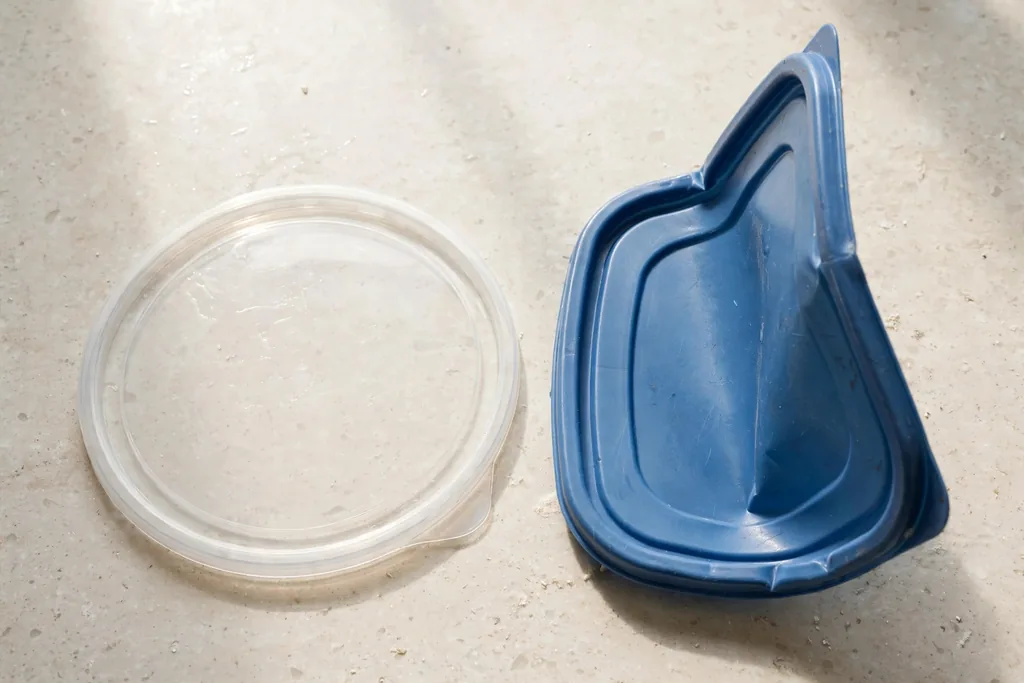
Good food container lid storage starts with the purge: retire any lid that fails the flat test. Set it on the counter and press one edge. If it rocks or lifts at a corner, it's warped and will never seal right again. Warped lids also wedge crooked in vertical organizers and push neighboring lids out of line, so one bad lid can ruin a whole row. Toss it.
Check the seal too. Run your finger around the rim and the gasket channel. Cracks, deep cuts, or a gasket that no longer sits snug mean the lid is done, even if it looks fine from above. Stains are cosmetic and don't matter; a tomato-stained lid that seals is still a good lid. A crystal-clear lid that doesn't seal is garbage with good lighting.
This step feels wasteful, but it's the opposite. Every orphan and warped lid you keep steals a slot from a lid that works. Most lid chaos isn't a storage problem at all; it's an inventory problem wearing a storage costume. Purge the dead lids first and your current shelf might be all the storage you need.
How many lids should you actually keep?
Food container lid storage works best at a sane inventory: keep enough to cover your real weekly pattern, then stop. Count what you actually use: daily lunch containers, the two or three leftover sizes you reach for, and the batch-cooking pieces if you meal prep. For most households that's 8 to 15 complete sets. Everything beyond that's backup inventory for a catering business you don't run.
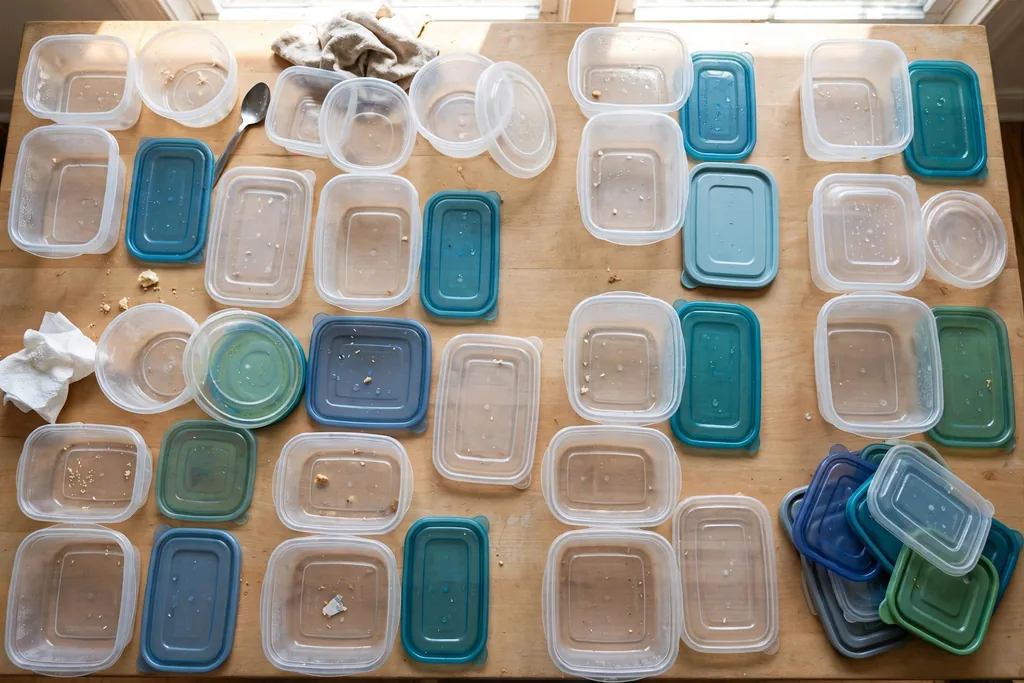
Do the full audit before you buy any organizer. Empty the cabinet onto the table, match every lid to a container, and make three piles: keepers with matches, orphans with no match, and damaged pieces. Research on visual clutter (McMains and Kastner, 2011, via PubMed) found that multiple competing stimuli fight for neural representation, which is a formal way of saying a crowded cabinet makes everything harder to find. Fewer pieces, each with a match, is the fastest upgrade in this guide.
Then run the one-in-one-out rule: a new container set only enters when an old one leaves. Tape the rule inside the cabinet door if your household needs the reminder. Without a cap, the collection regrows to avalanche size within a year, because every takeout container looks useful in the moment. Our pantry organization ideas guide uses the same cap system for lunch containers.
Before you buy anything, measure your tallest and widest lid, then use the decision table in the next section to match the right method to your kitchen.
How do you match the right method to your kitchen?
The right food container lid storage method follows your space, not what looks best in photos. Deep drawer? Tension rods or an adjustable organizer, because the top-down view makes everything findable. Standard cabinet shelf? Magazine holders or a dish rack, because they need no installation and hold plenty. Tiny kitchen with no spare shelf? The inside of a cabinet door or an undershelf basket, because both use space that's currently holding air. Renter who can't drill? Anything adhesive or freestanding; skip the pegboard.
| Your situation | Best method | Why it fits |
|---|---|---|
| Deep drawer available | Tension rods or adjustable organizer | Top-down view, lids and containers in one station |
| Standard cabinet shelf | Magazine holders or dish rack | No install, holds 8 to 12 lids per holder |
| Small kitchen, no spare shelf | Cabinet-door rack or undershelf basket | Uses dead space, zero shelf footprint |
| Renter, no drilling | Napkin holders, dish rack, tension rods | Freestanding or adhesive, moves with you |
| Open shelving | Pegboard with hooks | Visible, decorative, fully adjustable |
| Mostly glass lids | Wide-slot organizer on a low shelf | Padding between lids, no door mounts |
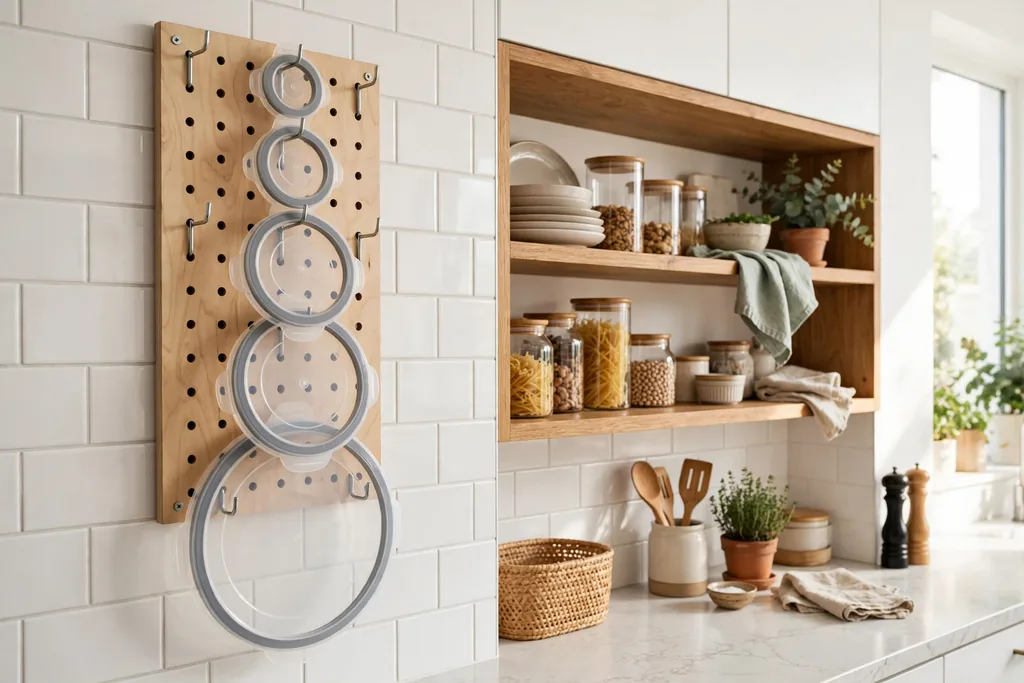
The pegboard deserves one caution: it's fantastic for open-shelving kitchens where lids can look intentional on the wall, and The Daily Meal’s pegboard DIY shows how to build the drawer version with dowels. But it needs wall space and hooks, and it puts your lids on display, which only works if the collection is already purged. Don't pegboard a chaotic collection; purge first, then display. Small kitchens have their own logic too, and our small kitchen storage ideas guide covers the full layout.
What mistakes make lid systems fall apart?
In food container lid storage, overfilling is the number one killer. An organizer packed so tight that you have to move three lids to remove one will be abandoned within a week. Leave breathing room: every lid should slide out without disturbing its neighbors. If the organizer is full, that's a signal to purge, not to buy a second organizer.
Buying before measuring is the second killer. Lid organizers come in real dimensions, and cabinets have rails, hinges, and framing that steal inches. Measure the interior width, depth, and height of your actual space, then measure your tallest and widest lids. An organizer that fits the shelf but not the lids is just an expensive paperweight.
The third killer is the household drift: one person builds the system, everyone else tosses lids wherever. Fix it with labels so simple a guest could follow them: small, medium, large, or round and square. If the label system needs explaining, it's too complicated. And keep one home for lids, not three. Lids migrate to whatever cabinet is nearest the dishwasher, so pick the spot closest to where clean dishes land and defend it.
What's the 30-minute system that ends the avalanche for good?
Here's the whole food container lid storage guide in one weekend project. Minutes 0 to 10: empty the cabinet, match every lid, and toss the warped, cracked, and orphan pieces. That toss pile is a small declutter win; for the whole-house version, see our fall decluttering checklist. Minutes 10 to 15: measure your space and your tallest lid. Minutes 15 to 25: install your chosen method, magazine holders for shelves, tension rods for drawers, a rack for the door. Minutes 25 to 30: file the keepers vertically, daily lids at the front, specialty lids at the back.
My final judgment: the method matters less than the purge and the vertical filing. A $1 napkin holder with a purged collection beats a $25 organizer stuffed with dead lids. Start with the magazine-holder hack this weekend, because it's five minutes and five dollars, and upgrade to adjustable dividers only if your collection outgrows it. Then put the one-in-one-out rule on the cabinet door and do a five-minute re-match every few months. That's the system. It's not exciting, which is exactly why it still works in year two.
For your next project, the best pantry organization bins guide pairs bins with these lid zones, and our kitchen drawer organization guide finishes the drawer half of the system.
What's the best way to organize food container lids?
File lids vertically, on their edges like records in a crate, instead of stacking them flat. Use a magazine holder, dish rack, tension rods, or an adjustable lid organizer to hold them upright. Keep containers nested separately nearby. This works because every lid stays visible and you can remove one without moving the rest.
Should containers and lids be stored separately?
For most kitchens, yes. Separating them lets containers nest inside each other, which saves serious space, while lids filed vertically take up one compact zone. The nesting is the space saving; the vertical filing is the sanity saving. Small collections of under 8 sets can stay paired if you prefer, since the savings are minor at that size.
How do I organize lots of different lid sizes?
Sort by shape first, then by size: round small, round large, rectangular, and so on. Adjustable dividers let you build custom-width slots for each group. Avoid slots so narrow that lids wedge; every lid should slide out without pulling its neighbors.
How can I organize container lids in a small kitchen?
Use space that's currently empty: the inside of a cabinet door with a slim rack, or an undershelf basket clipped under a shelf. Purge hard first, because a small kitchen can't afford orphan lids. Keep only the 8 to 12 sets you actually use weekly.
How do I stop lids from falling over in a drawer?
Use dividers or an organizer with narrow sections, and don't leave wide empty gaps where lids can flop. Tension rods installed front to back create snug channels. If lids still topple, the sections are too wide for the lid count; add a divider or remove a few lids.
What should I do with lids that have no matching container?
Confirm the container is truly gone, then recycle the lid if your local program accepts that plastic, or repurpose it as a paint tray or plant saucer. Don't keep orphan lids "just in case"; lids with no matching container are the fastest-growing clutter in the cabinet.
Can pot lid organizers be used for food storage lids?
Often yes, if the slots fit. Pot lid racks are sturdier and their slots are usually wider, so they handle large or glass food lids well. Measure your lids against the slot width first. Purpose-built food lid organizers have narrower slots that suit small plastic lids better.
Can I store heavy glass lids on a cabinet door?
No. Glass lids are too heavy for adhesive-mounted door racks and risky on any door that gets slammed. Store glass lids low, filed vertically with soft padding between them, on a shelf or in a drawer. Reserve door storage for lightweight plastic lids only.
How often should I re-match my lid collection?
Do a quick match every few months, or whenever you notice digging again. Pull everything out, pair lids with containers, and remove new orphans and warped pieces. The whole reset takes about five minutes once the system exists.
